Customer Satisfaction Score (CSAT) trigger distribution in Front

This article will show you how to start measuring Customer Satisfaction Score (CSAT) via triggers - automated emails after a conversation is resolved - in your Front account.
You can either follow the integration video manual or follow the written documentation below the video.
Integration video manual
Written documentation
Requirements
In this article
NOTE: every step is the article is the same for CSAT,NPS and CES
Enable integration in Front
In the settings of your Front account, go to integrations and choose Nicereply from the app directory. Here you need to do a few more things:
1. Click Enable integration

2. Enable Nicereply
3. Insert company URL - the company url is available in Nicereply settings in your account, then save settings
Connecting Front with Nicereply
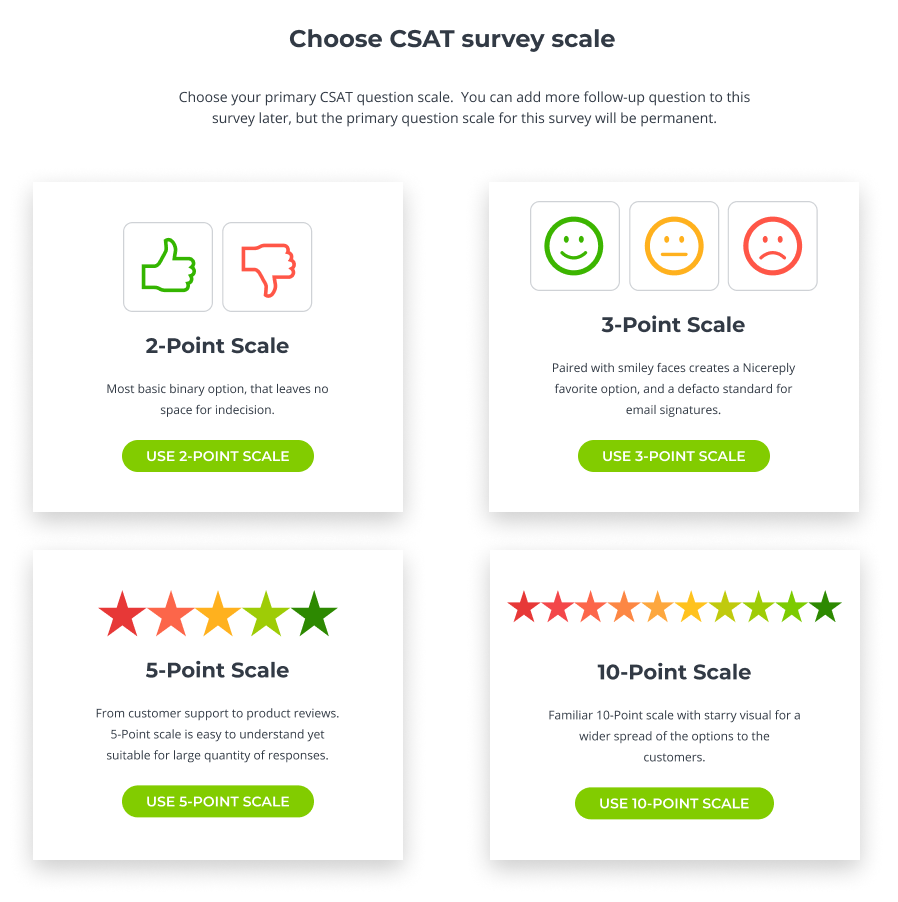
1. Choose the CSAT metric in the “left menu” in your Nicereply account. Click on START CSAT. If you do not see the START CSAT button click on NEW SURVEY button in the top left corner of the screen. Then, Choose your primary CSAT question rating scale. Once you choose the survey rating scale it is not possible to change it later.

2. From distribution options choose TRIGGER
3. You’re on the app directory page now, click on Front icon
4. In the next step add your Front Token, to get your Token go to your Front account > go to Settings > Plugins and API > then click on API and create New Token.
Important Tip: Name your new token Nicereply. This will ensure that all your customer feedback is pushed into your Front conversations properly.
Select the following scopes: Shared Resources and Private Resources, then click create.


Hit Connect and continue to activate your agents in the next step.
5. Add your user from Front to Nicereply. New users will get an automated email with login instructions from us
Trigger activation in Front
6. You’re on the good way! The CSAT trigger is waiting for for activation.

7. You can manage the trigger behaviour in “Trigger settings”. When you’re ready hit the “activation” button.
Important! As you can see, the "Send After" option says "Send after x hours ticket is solved without a response from customer". In this case, the ticket stands for a conversation. This means that you are setting up the number of hours since the conversation resolution after which the survey is sent.
You can also filter (segment) your surveys by a tag or by a mailbox in Front. In this case, the mailbox equals an inbox.

When you're done editing your trigger settings click SAVE SETTINGS, hit the "activation" button, and activate your trigger to start distributing your surveys.

Allow private resource access
In order for Nicereply to be able to push your customer feedback data directly into your rated conversations as a note & tag, you must enable private resource access in your Front account.
To do so navigate to Front, then Settings, click on Personal, and finally Preferences. Here, search for API and enable the " Allow access to my individual resources via the API" option. When you're done click Save.

Helpful Tip: Each user has to grant the Private Resources access in his/her personal preferences. However, you can grant access to your entire team yourself. Simply navigate to Front, Settings, then Company, and click on Teammates. Then choose a teammate, search for API and enable the "Allow access to my individual resources via the API" option. When you're done click Save.
Good job!
Nicereply will utilise your existing integration with Front and the workflow is follows:
1. After CSAT trigger activation Nicereply will start scanning the status of your conversations on a regular basis
2. Nicereply will send the CSAT survey to the conversation requestor for all conversations created via Email channel, with status Resolved and without conversation update for 48 hours (by default)

3. Nicereply will collect the CSAT feedback and push it to Front
