Net Promoter Score (NPS) for Outlook
Empower your Outlook with Nicereply. In this article you can find out everything important about the Nicereply integration.
You can either follow the integration video manual or follow the written documentation below the video.
Integration video manual
Written documentation
NOTE: every step in the article is the same for CSAT,NPS and CES.
How the integration works
The first thing you need to decide is what satisfaction metric you'd like to measure. Nicereply offers three metrics:
- Customer Satisfaction Score
 If you choose a CSAT survey, you can also choose the type of rating scale. See the examples below:
 If you choose a CSAT survey, you can also choose the type of rating scale. See the examples below:


After you decide what metric you want to measure you need to decide which distribution option to use. You can measure customer satisfaction directly in your Outlook signature (email template). Then connect your Outlook account with Nicereply.
After you choose email template you copy Nicereply survey code and insert it into your Outlook email template. In this case a customer will be able to rate you after each interaction, because the survey will be placed in your signature.
Adding Customer Satisfaction Score to Outlook
1. Choose the NPS metric in the “left menu” in your Nicereply account. Click on START NPS. If you do not see the START NPS button click on NEW SURVEY button in the top left corner of the screen

2. From distribution options choose EMAIL TEMPLATE.
3. In the next step click on Outlook icon.
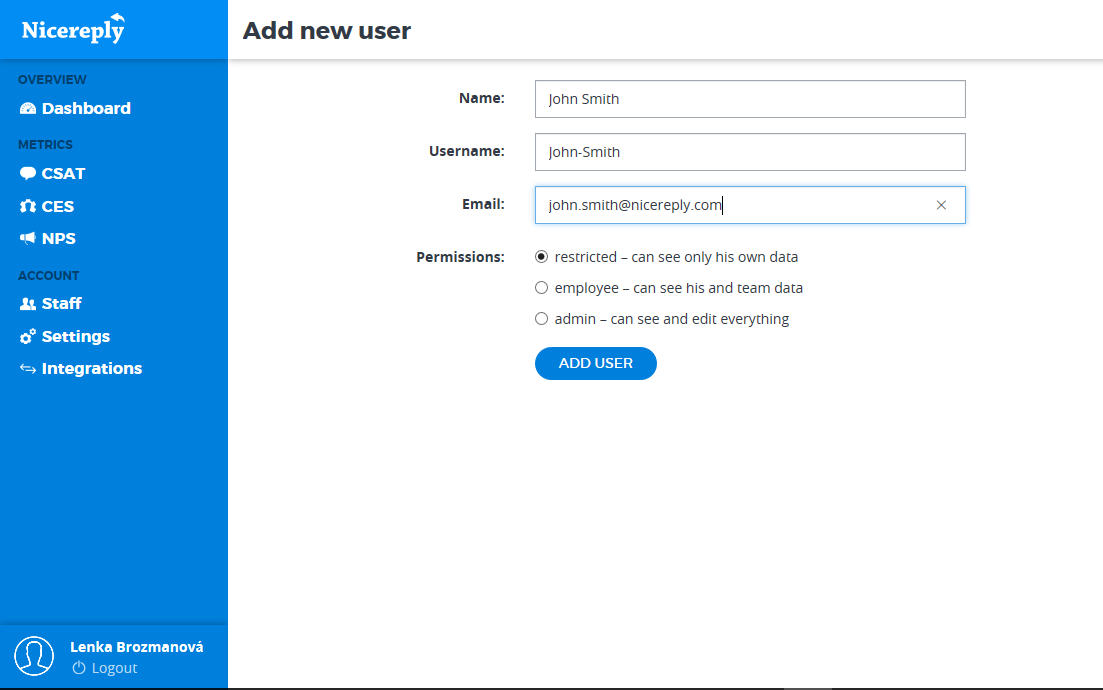
4. Connecting Nicereply with email services such as Gmail or Outlook requires you to add each user to your Nicereply account. Click “ADD USER”.

5. In the next step add Name, Username and and Email of your new user. New users will get an automated email with login instructions from us.
6. When you are done adding new users to your Nicereply account click “CONTINUE”.
7. You're on the good way! To collect customer feedback, you need to place NPS into your signature in Outlook account.On this page copy (CMD+C/CTRL+C) Preview of your your chosen NPS Survey.

8. Open your Outlook and go to File - Click on Options - then go to Mail tab - click on Signature and create New


9. In the next step name your signature and click Ok
10. Move to Edit signature part (section) and paste the NPS preview, then click Ok and confirm setup in Nicereply

Good Job!
Your Outlook templates will now contain NPS and all collected ratings will be stored in Nicereply under NPS tab.
