Customer Satisfaction Score (CSAT) email template distribution in Salesforce Service Cloud

This article will show you how to start measuring Customer Satisfaction Score (CSAT) directly in your Salesforce Service Cloud email template (signature).
You can either follow the integration video manual or follow the written documentation below the video.
Integration video manual
Written documentation
Requirements
- Admin access to a Nicereply
- Admin access to a ServiceCloud
In this article
- Connecting Salesforce with Nicereply
- Adding email template to Service Cloud
- Setting Nicereply email template as default
NOTE: every step is the article is the same for CSAT, NPS and CES
Connecting Salesforce with Nicereply
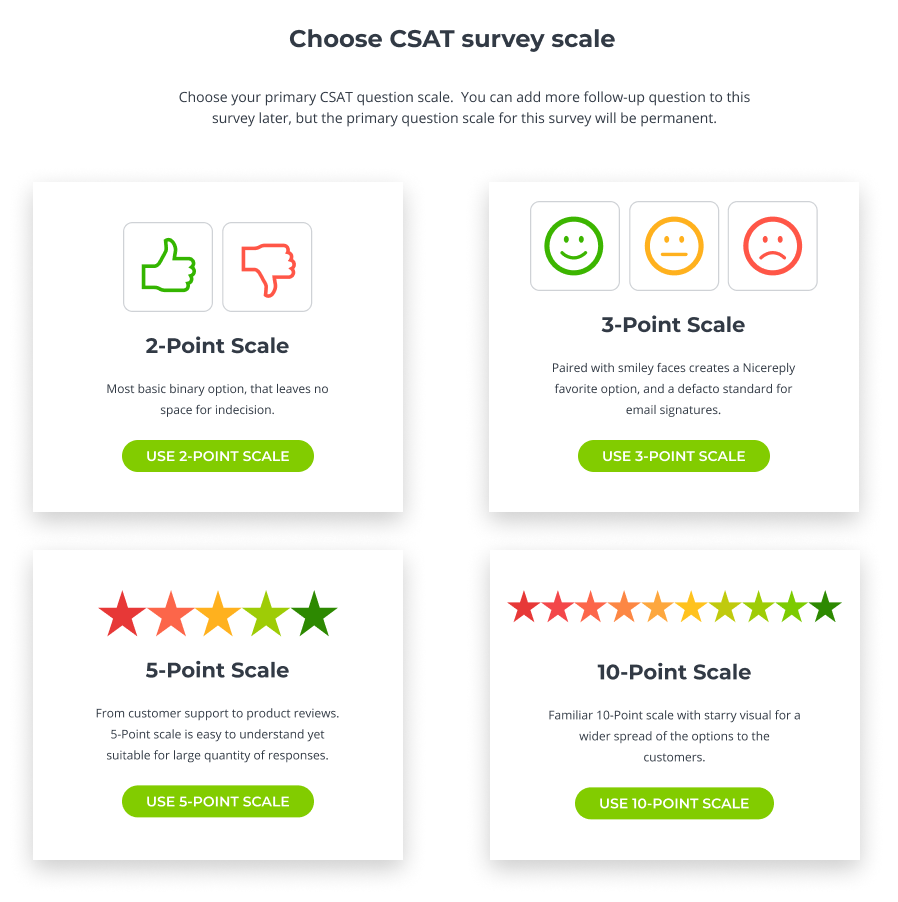
1. Choose the CSAT metric in the “left menu” in your Nicereply account. Click on START CSAT. If you do not see the START CSAT button click on NEW SURVEY button in the top left corner of the screen. Then, Choose your primary CSAT question rating scale. Once you choose the survey rating scale it is not possible to change it later.

2. From distribution options choose EMAIL TEMPLATE
3. You’re on the app directory page now, click on Service Cloud (SalesForce) icon.
4. In the next step get your Salesforce URL. Login into your Salesforce Service Cloud. Then copy your URL from the address bar.

5. Paste your URL in the input window and click continue.
6. Import your agents from Salesforce to Nicereply by adding them one by one, or importing them from CSV. The best way is to import your Salesforce agents from CSV.
7. First, create a CSV file with the following agent information - name, email and their Salesforce user ID. The user 15-digit ID can be seen in the URL when you access the agent's user detail page. IMPORTANT!!! The URL is displaying 18-digit iD, so you need to delete the last 3 digits after copying the id into your data file.


8. Evey agent record will look like this. When you're done, save the CSV file and then import it in Nicereply click IMPORT FROM CSV.

9. Upload your CSV file, choose whether you want these agents to have access to Nicereply, choose their role and click IMPORT.

When you're done click CONTINUE. Every imported agent will get an automated email with login instructions from us.
Adding email template to Service Cloud
10. You're on the good way! To collect customer feedback, you need to place CSAT code (smiley faces) into your ServiceCloud email templates. Now copy CSAT code.

11. Go to your Service Cloud account > click Setup > Email > Classic Email Templates. Then click New Template.
12. In the next step you need to choose the type of email template you would like to create. Choose Custom and click Next.
13. Now insert email template Name, Folder where you want to store it, and allow available for use option. Then click next.

14. Now enter the subject of your new email template. Then paste the CSAT code you've copied in the step 10 into the HTML body.
15. Note: If you want your email template to have other parts, such as greeting or date, insert this code in front of the Nicereply code:
<p>{!Today}<br /><br />Dear {!NullValue(Contact.FirstName, "Sir or Madam")},<br /><br /><br />Sincerely,<br /><br />{!User.FullName}<br />{!Organization.Name}<br />{!User.Email}</p>

Then click Next.
16. Now we need to create text-only version. To do this Go back to Nicereply, scroll down, copy the text-only version and paste it into Salesforce text version.


Then click Save.
Don't forget to click Confirm setup completion in Nicereply account.
17. When you'll want to use your new Nicereply template when replying to a case, open that case, click email, and then click insert, create or update email template. Click insert email template. Then choose your new Nicereply email template.


Setting Nicereply email template as default
If you want to set the email template you've created as default follow these simple steps.
Good job!
Your email templates will now contain CSAT (smiley faces) and all collected ratings will be stored in Nicereply under CSAT tab.

And you'll be able to identify collected feedback with a direct link to the rated case.
